The Processes at Chrysalis Art to Wear
FELTING
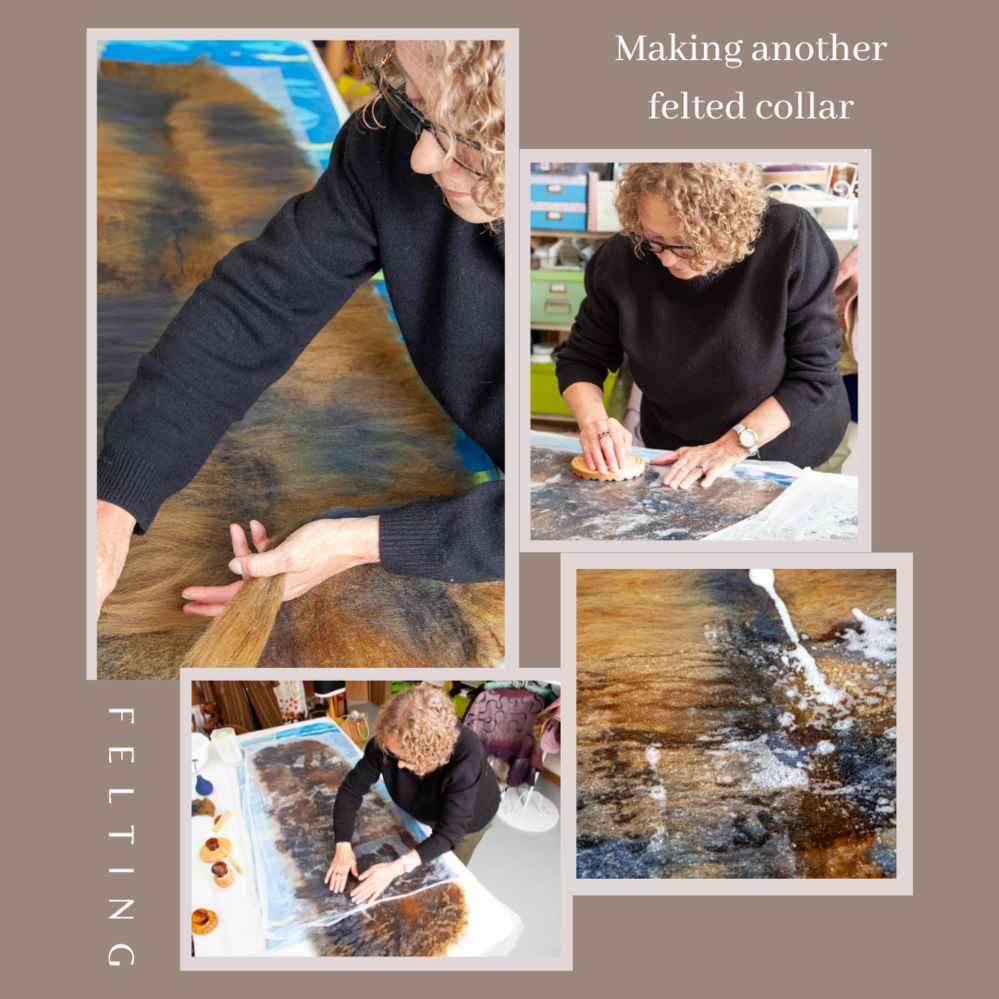
Felt making is a very physical process, taking much skill and practise. Many hours are spent on each piece to ensure that it is well made and of high quality. I’ve worked with felt making for many years, studying and learning with some of the best international tutors. I am also a member of the International Feltmakers Association.There are several stages to go through to get a finished item, starting with the idea and design, then choosing the most suitable wool fibres for the product – each breed of sheep produces wool suitable for specific projects. I source the fibres I use for a lot of my projects from artisan hand dyers to ensure high quality. Other fibres such as the Berchaf used for the Rucksacks and Handbags, come from Adelaide Walker in the UK.
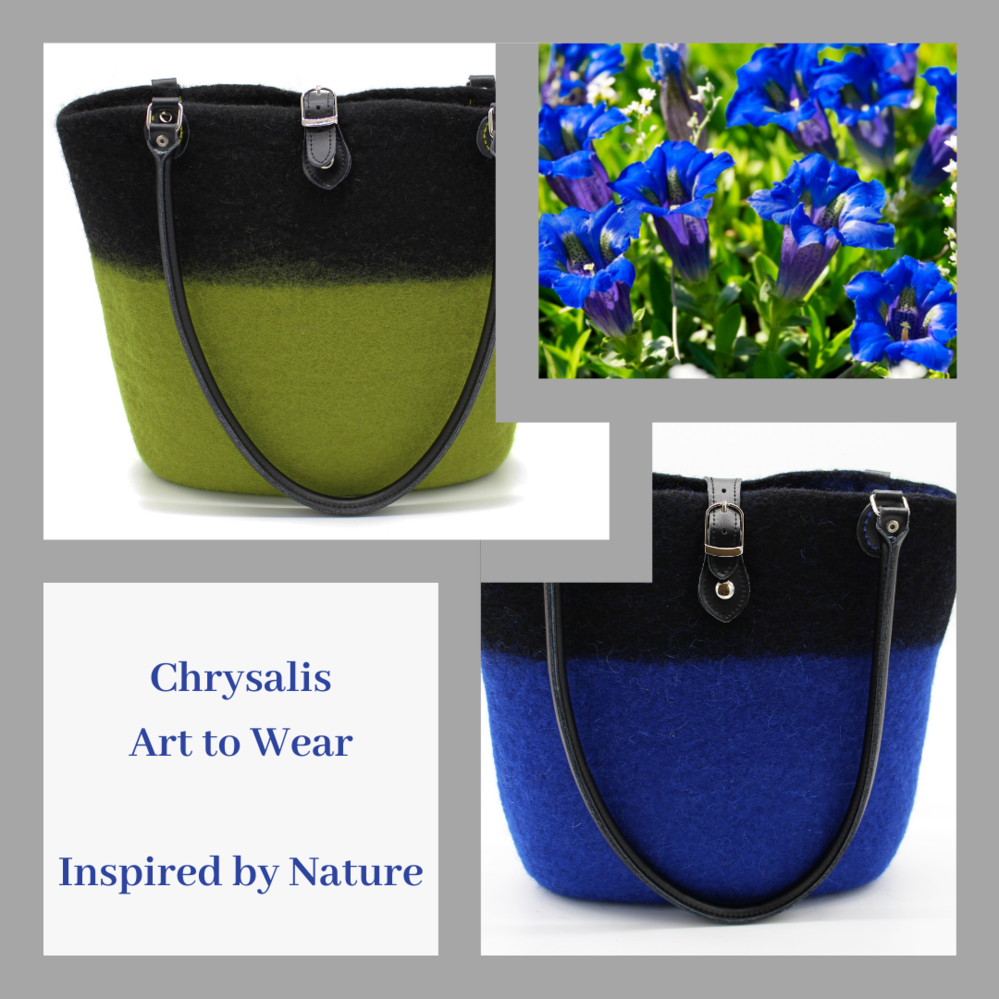
BAGS
For some pieces I use resists so that it will become a 3D shape as in the handbags and vessels. The wool fibres are gently pulled from the roving and laid thinly over the resist, these are then sprinkled with water, covered with bubble wrap and flattened using my hands to work the water through the fibres & expel the air. The same is repeated on the other side. Each side will have 5 or 6 layers of fibres, each layer being laid out at 90 degrees to the previous one. The fibres overlapping the edge are thinned and folded to the reverse side being careful not to create a thick line.
I then cover the piece with the bubble wrap and use various wooden felting tools to work the fibres so that they shrink and connect together. I also work my hands over the surface. Once the fibres are connecting well, I roll the piece with a pipe inside to shrink the fibres further. Eventually the resist is removed. This is when a lot of work using the wooden tools begins to ensure a firm, smooth finish and a good shape. The bags are then rinsed and wrung out, shaped and left to dry. Once dry the leather handles and fastener are hand sewn in place using complimentary coloured embroidery threads. The inner pocket, also made using a resist, is hand stitched down the centre line to make 2 pockets.
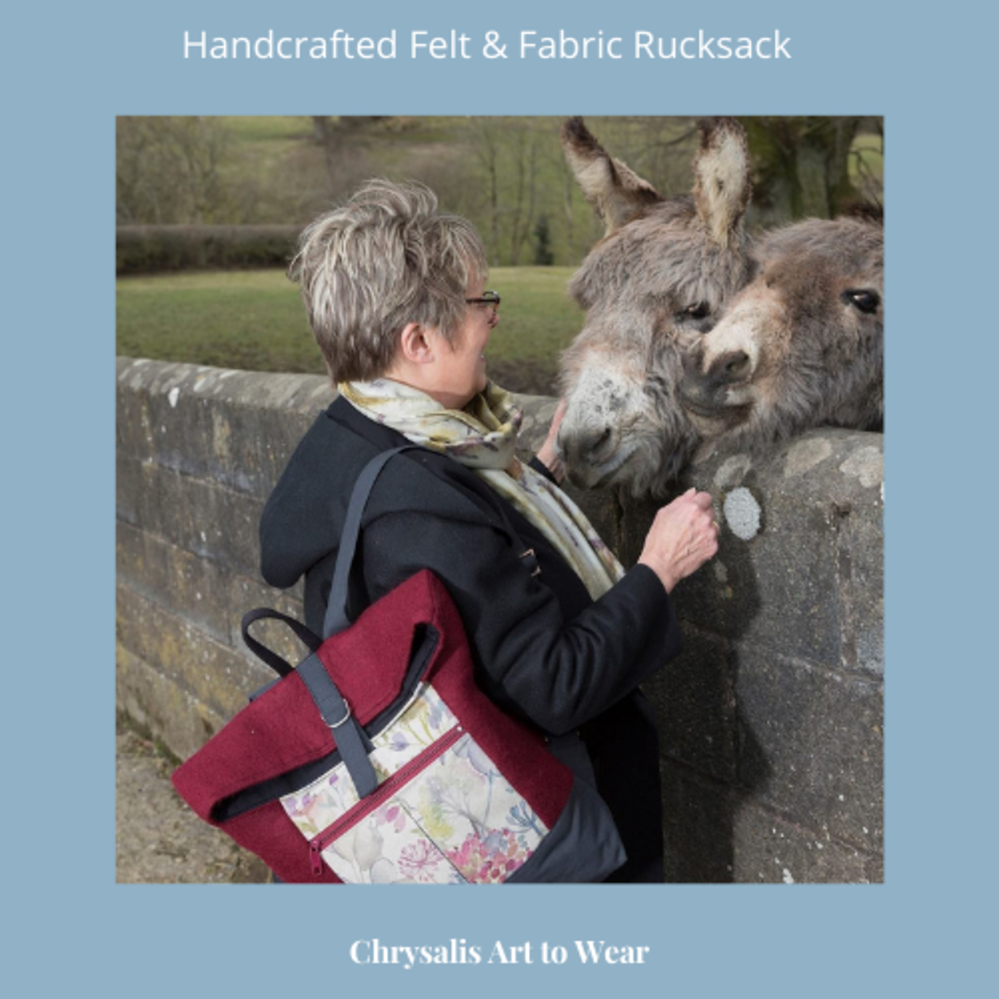
RUCKSACKS
When making the rucksacks, the process starts with the fabric which makes up the centre front panel. I choose the colour for the Bergchaf wool fibre to compliment one of the colours in the fabric, so that the combination works well together.
The felt fabric is made by laying out the fibres in 5 or 6 layers, wetting down with water, covering with bubble wrap and working my hands over the top pushing the water through the fibres and to begin the felting process. The piece is then rolled up round a pipe and rolled applying pressure, then unrolled and rolled up again from the other end, working in this way round all four sides. This process takes some time until the piece has felted properly. It is then rinsed and dried.
The fabric and felt pieces are then cut out and assembled on the sewing machine. The whole process usually takes a couple of days.
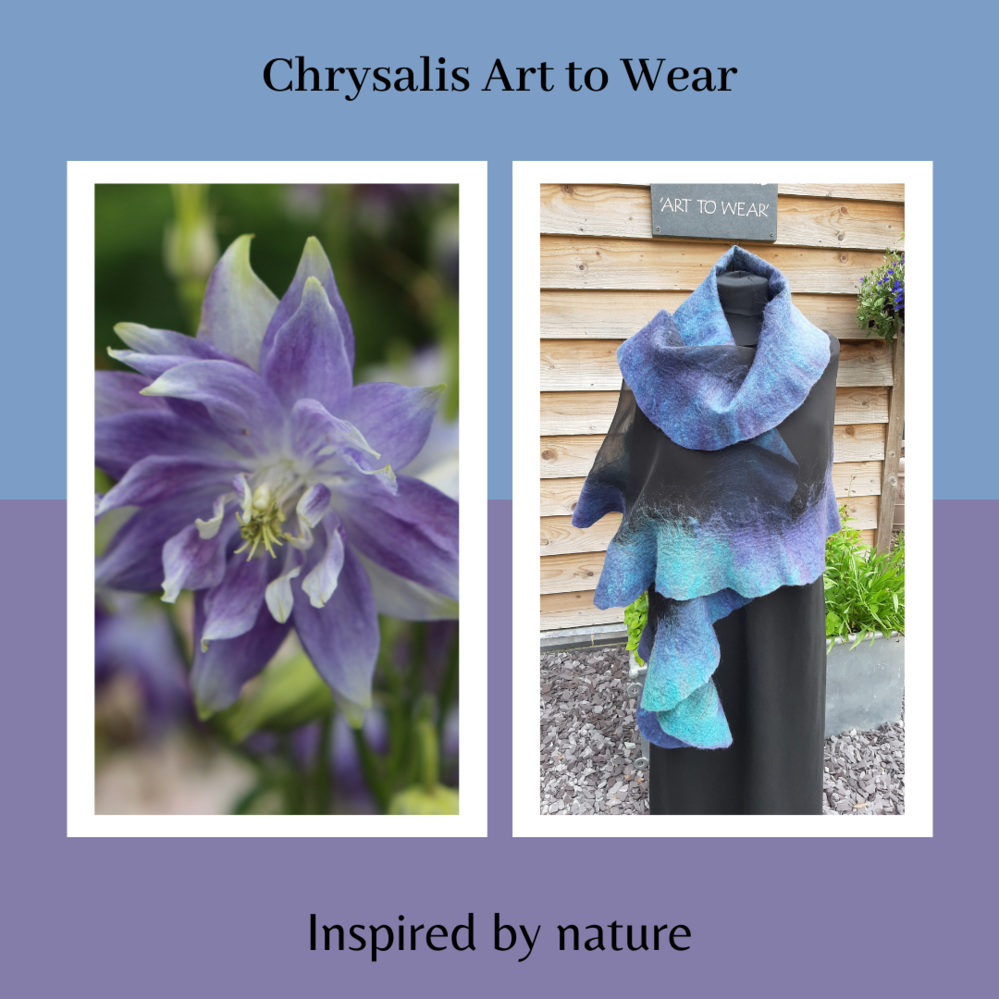
NUNO FELTED WRAPS
A lot of the inspiration for the Nuno felted wraps is gained from the beautiful colours of the flowers in my garden, I then try to recreate them in my work to produce a lovely piece of art to wear.
Colours are blended, the organza fabric shape used for the centre is cut, and the fibres are then laid out thinly around the edges of the fabric so that they overlap the fabric but come over the edge as well. The fibres are wetted out, bubble wrap put on top and the whole piece turned to the other side where the process is repeated. Most of the felting process is done with my hands, working gently over the fibres encouraging them to migrate through the fabric and connect with the fibres on the other side. This part can take several hours of patient work. Once the fibres have felted properly, I then work on the edges to ensure a smooth neat edge making a high quality wrap. The whole piece is then rinsed and dried before being carefully ironed.
The fabric and felt pieces are then cut out and assembled on the sewing machine. The whole process usually takes a couple of days.
ECO PRINTING
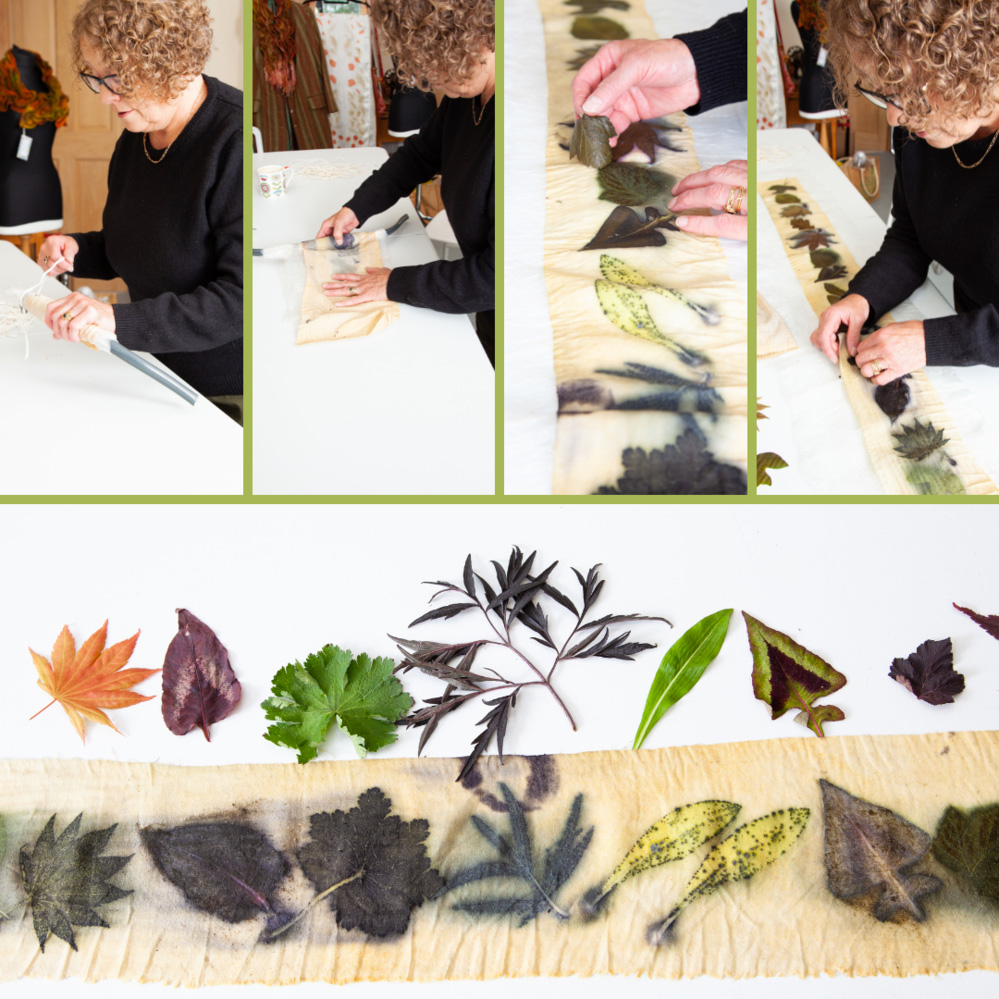
The first stage of the eco printing process is hand selecting suitable fabrics and preparing them in a mordant solution to ensure that the prints will keep their colours and not wash out.
I then go round my studio garden in rural Mid Wales carefully selecting leaves and flowers to put together to make the designs. Among my favourites are Walnut, Japanese Maples and Cotinus.
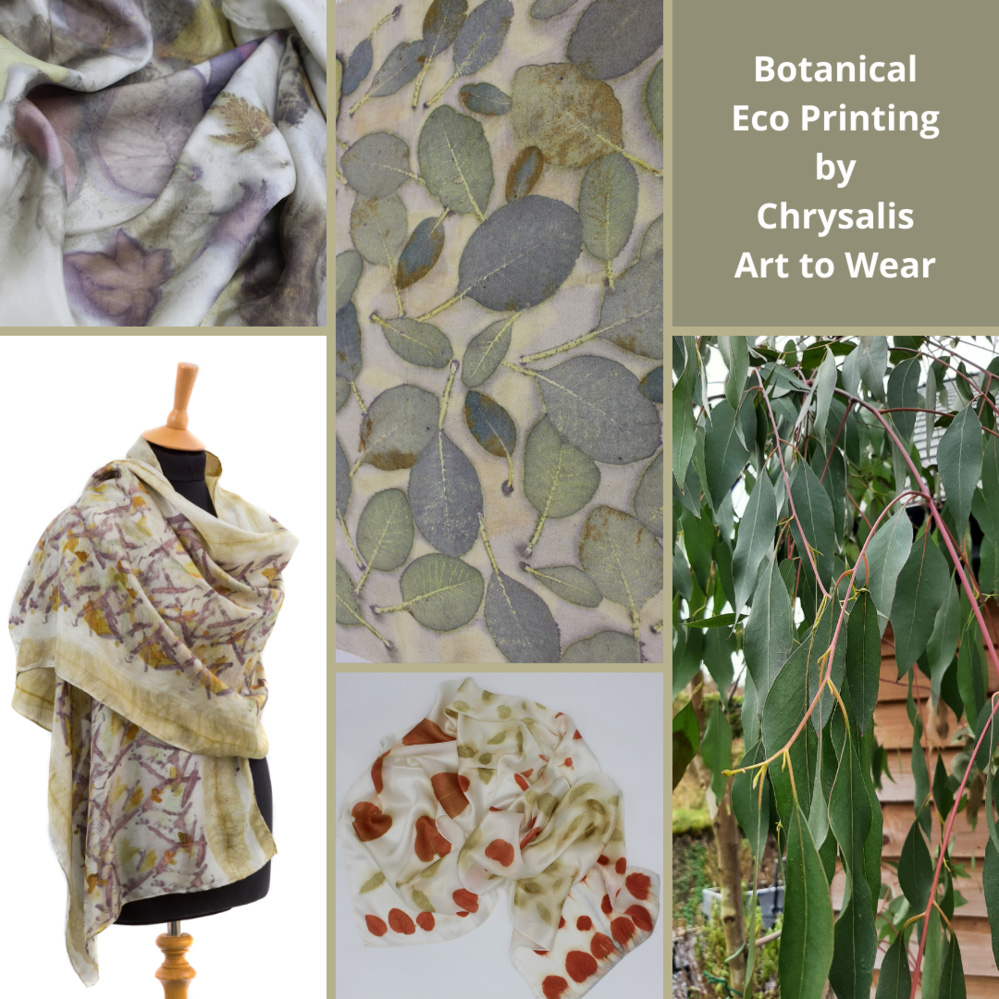
Once the fabric is ready to use, the leaves are laid out on the damp fabric, this is then covered and rolled around garden hose or wooden dowel and steamed for 1.5 hours, the leaves leaving their beautiful natural shapes and colours in the fabric. The fabric is then unrolled, the leaves removed and the fabric washed, rinsed and ironed whilst still damp. The scarves are then ready for the perfect art to wear for my happy customers.
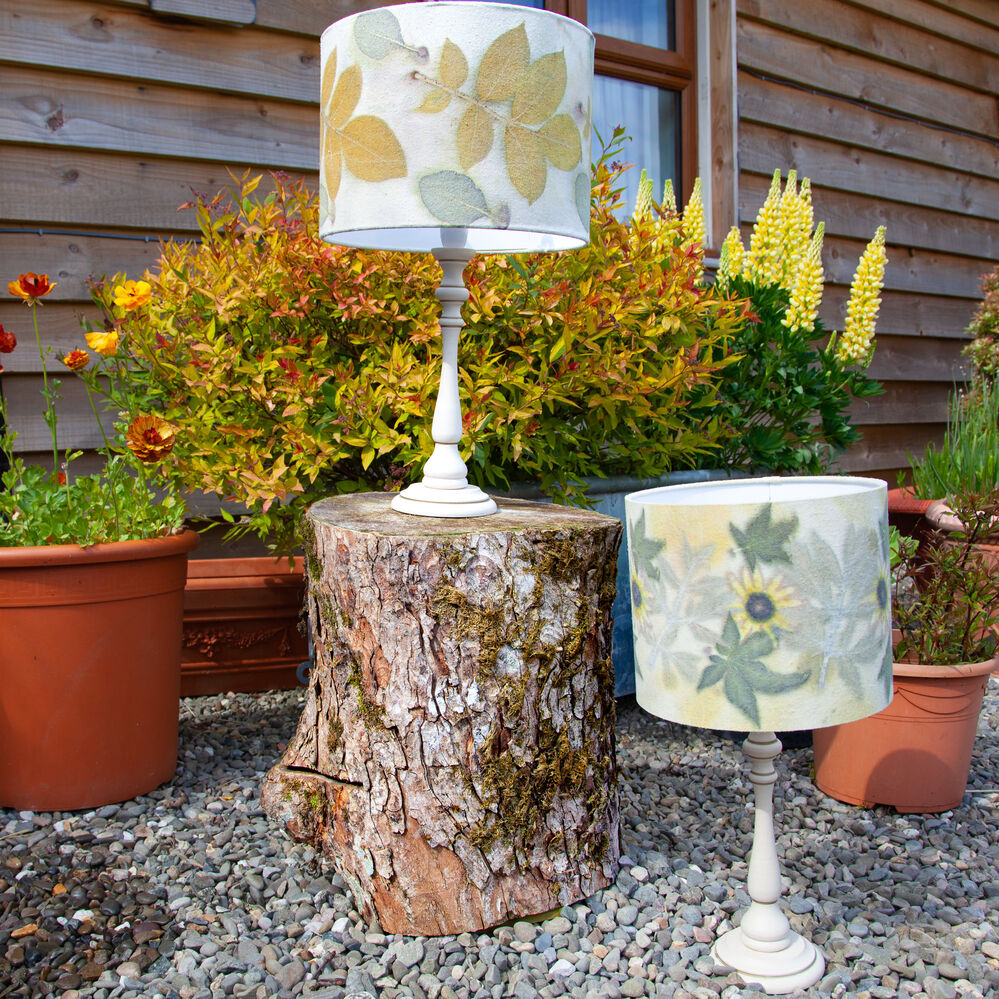
These designs look stunning, taking nature with you on your scarves and displaying in your home on lampshades and cushions.